OneAI Agent Quick Start
A step-by-step guide to creating your own Agent
Prerequisites
Make sure you have everything you need in order to start:
- Collect any resources you want to add to the Agent database (PDF, URL, free text, etc).
- Go to the Agent page in One AI website. If you don't have an account yet, sign up to access this tab.
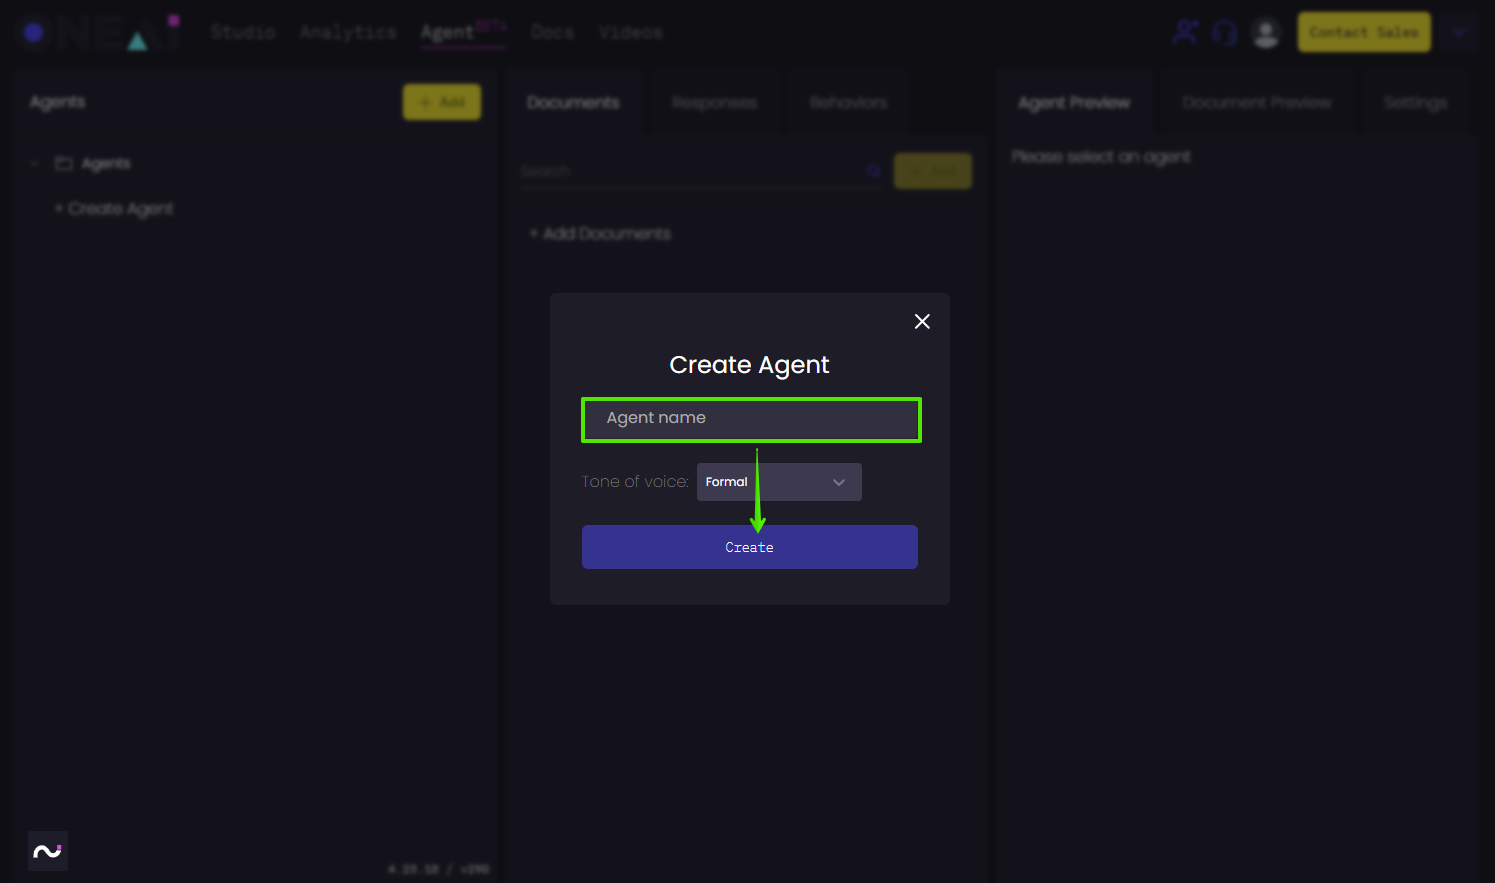
Create An Agent
- Click on "+ Add" or "+ Create Agent" in order to initiate the process.
- Define the Agent's name
- Choose its Tone-of-Voice (formal/friendly)
- Click on "Create"
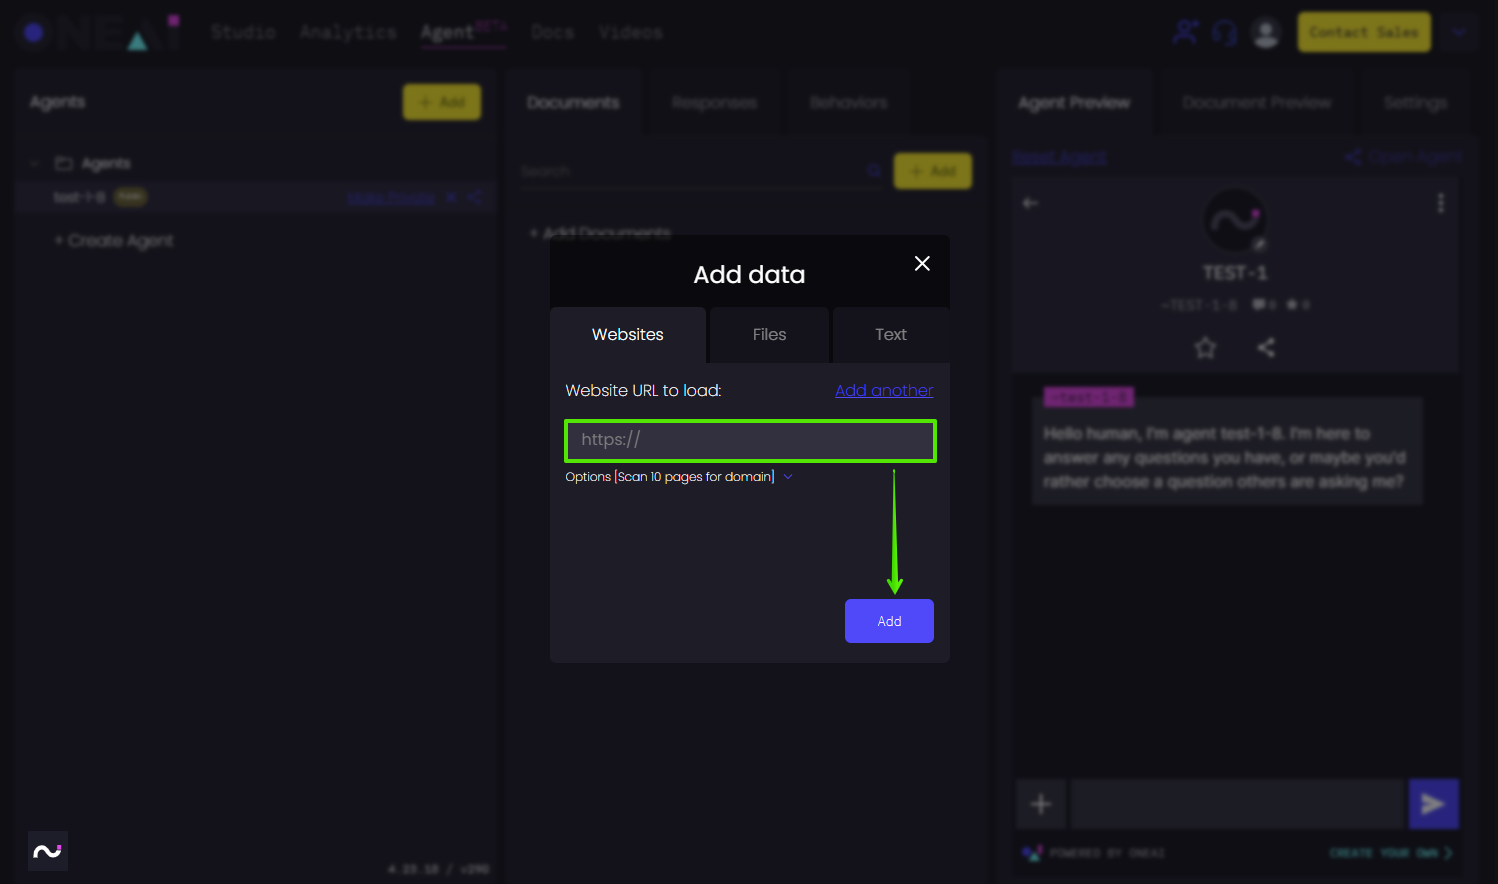
In the new "Add Data" window, you can now choose what resources you want to add to the Agent.
-
Choose the tab relevant to the type of resource you want to add
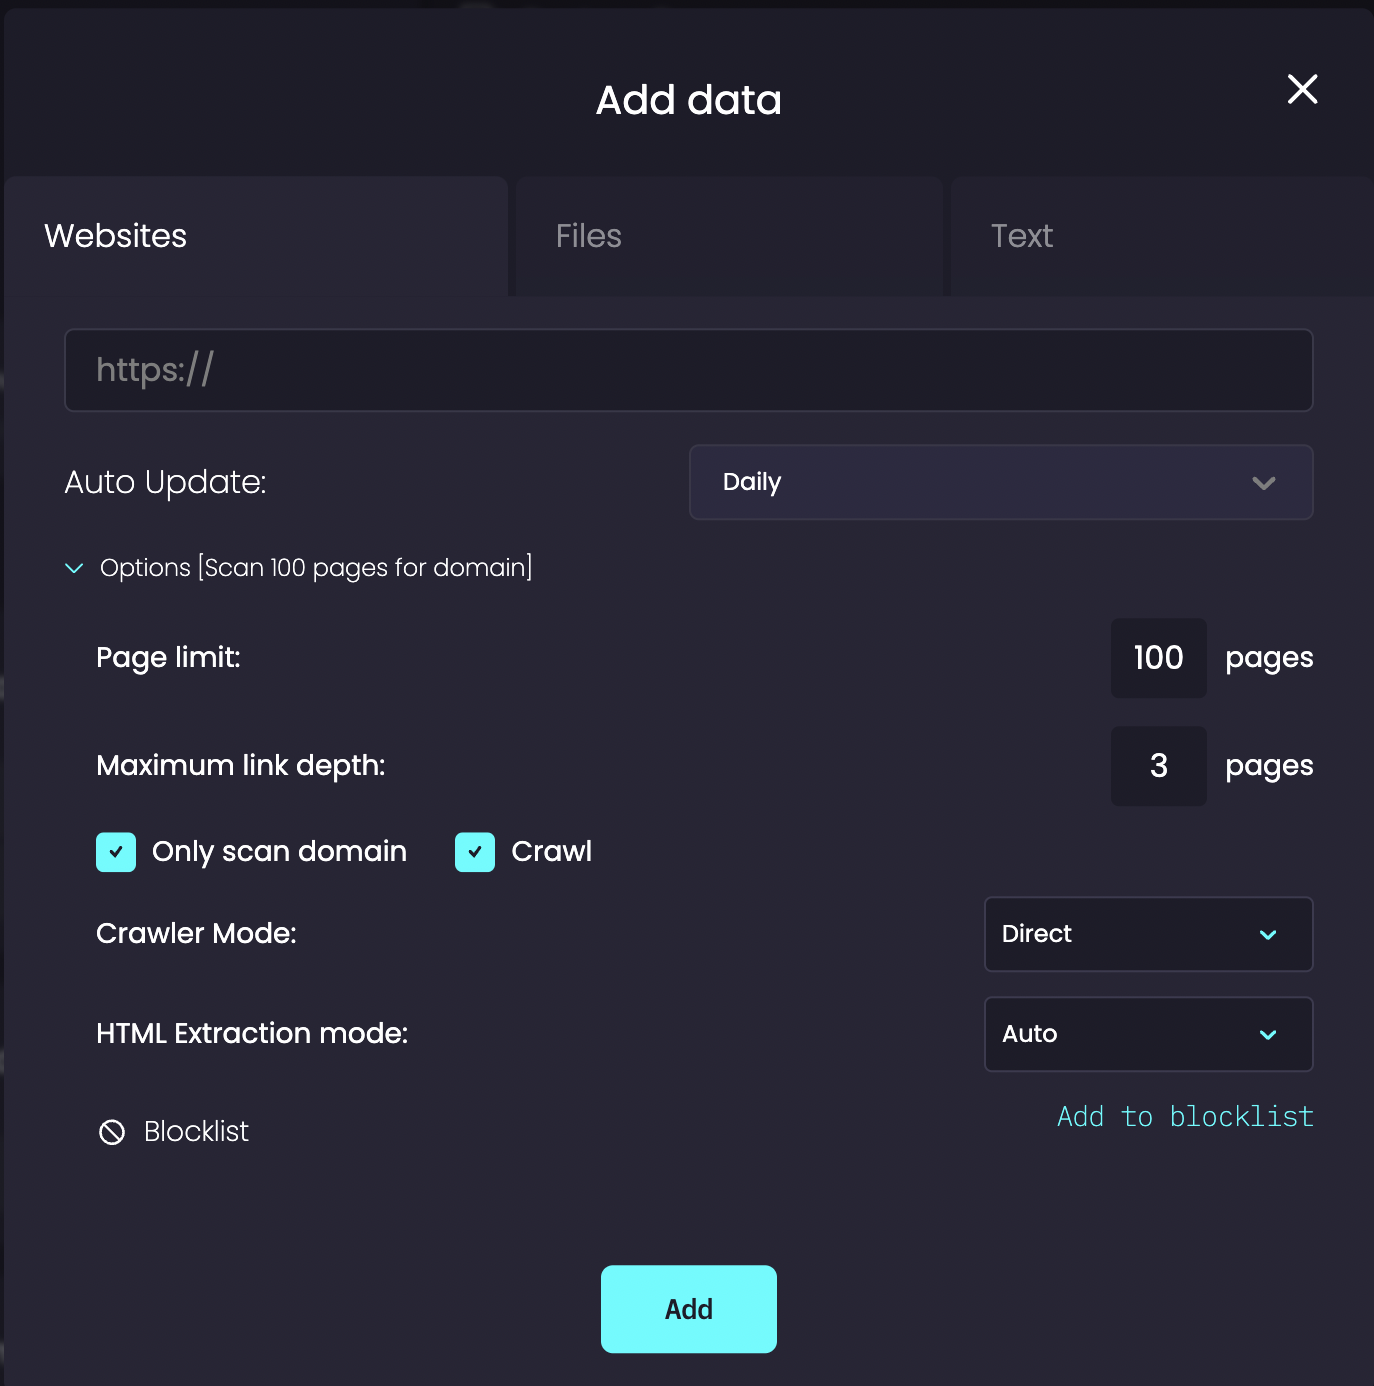
- Websites: insert a URL (see "Options" for more settings)
- Files: insert a PDF format file, either by browsing or drag-and-drop
- Text: insert your free text and give it an indicative title for future reference
-
Click on "Add"
-
Also notice there are advanced crawling options - use them as needed
-
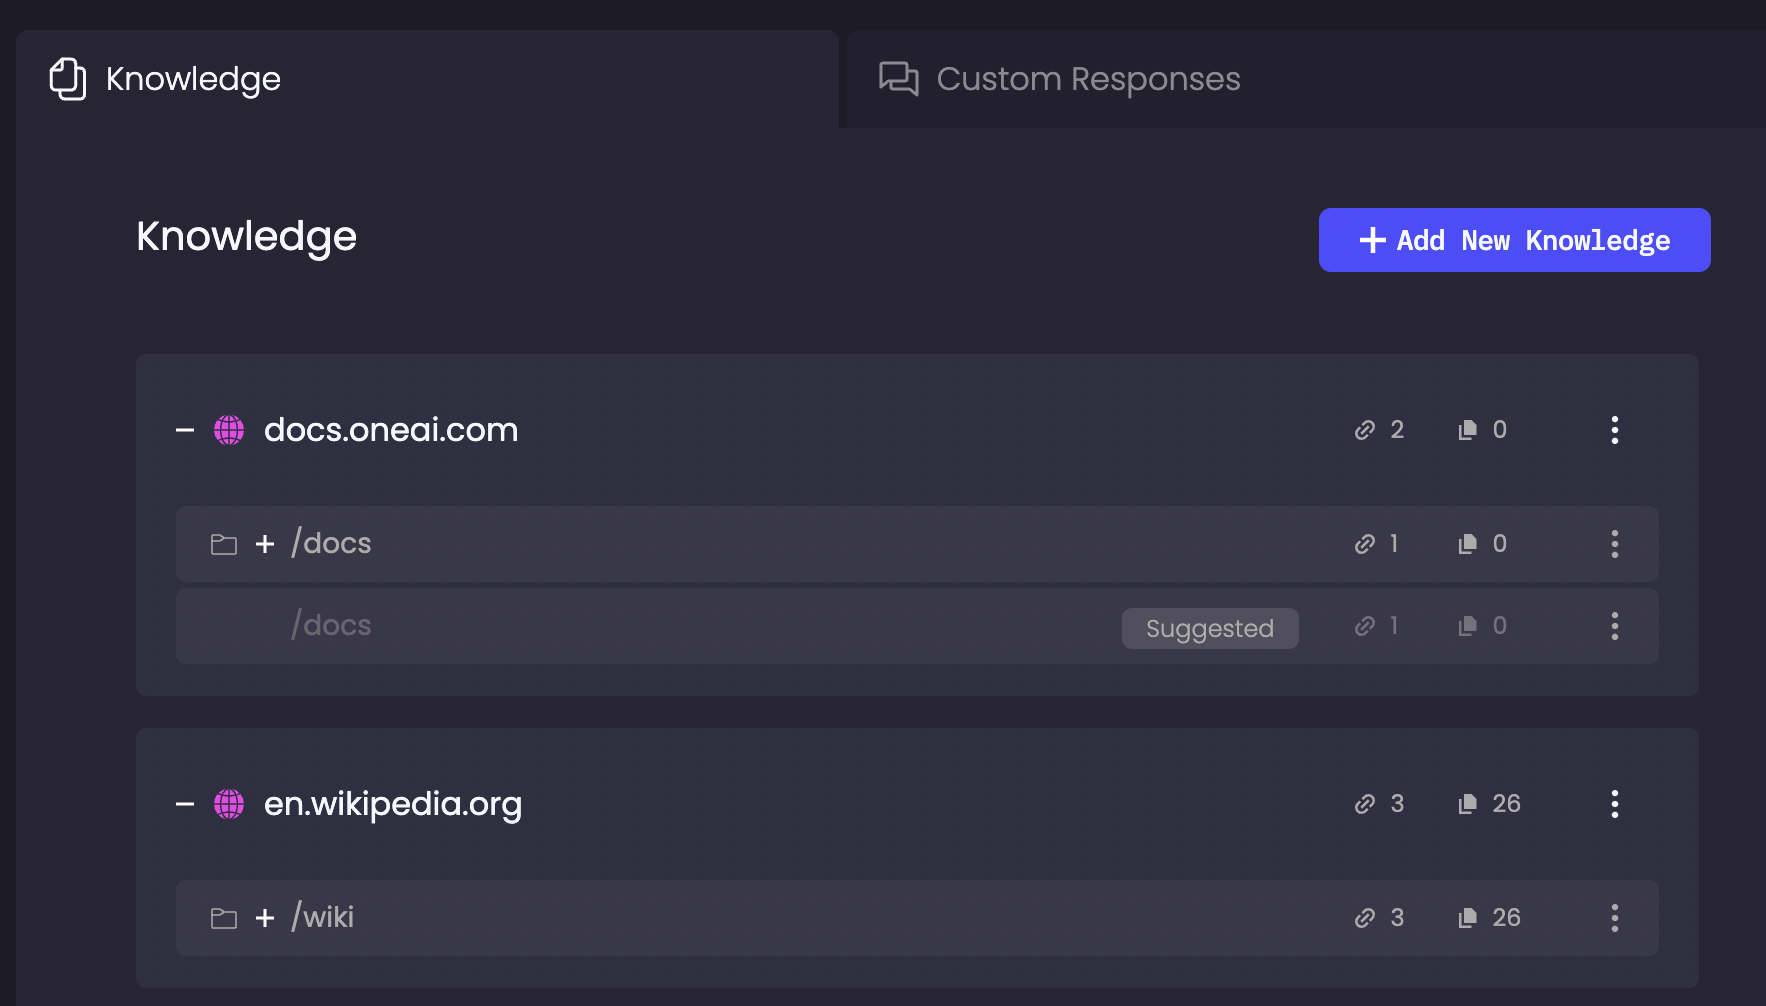
When the resource is fully uploaded (see "Text" or "Web" next to it in the list of documents), you can start asking the Agent questions about it.
-
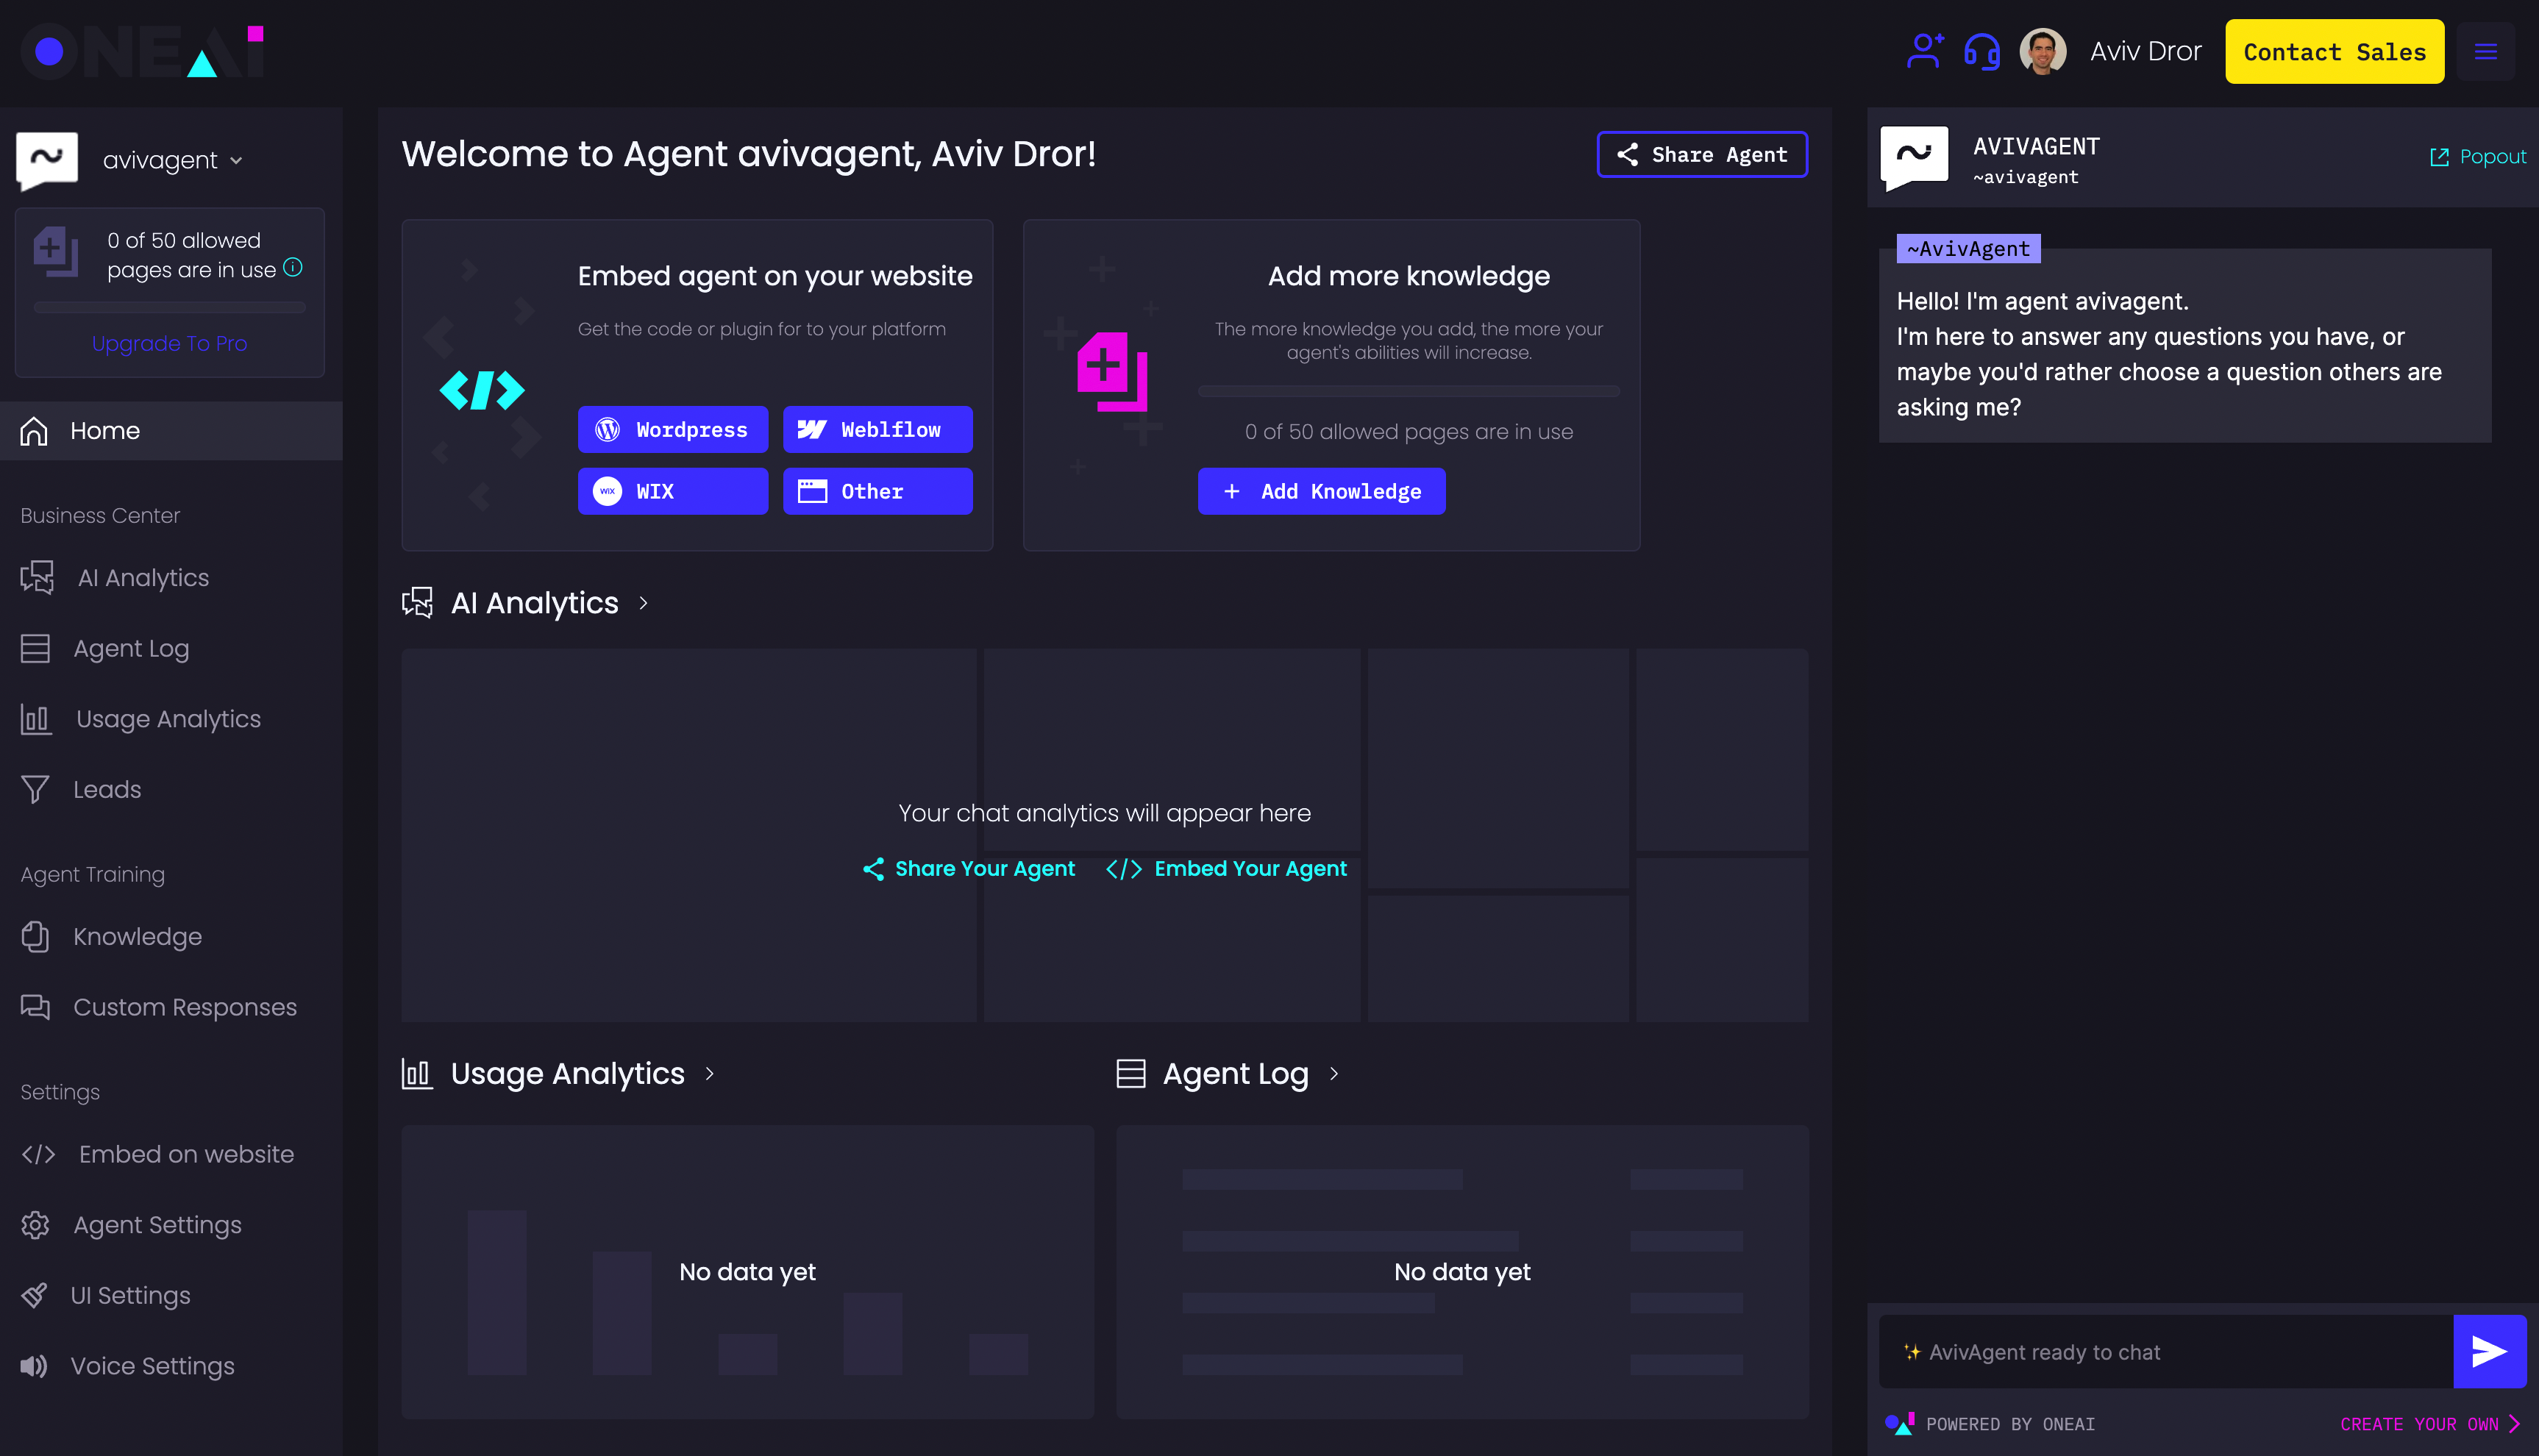
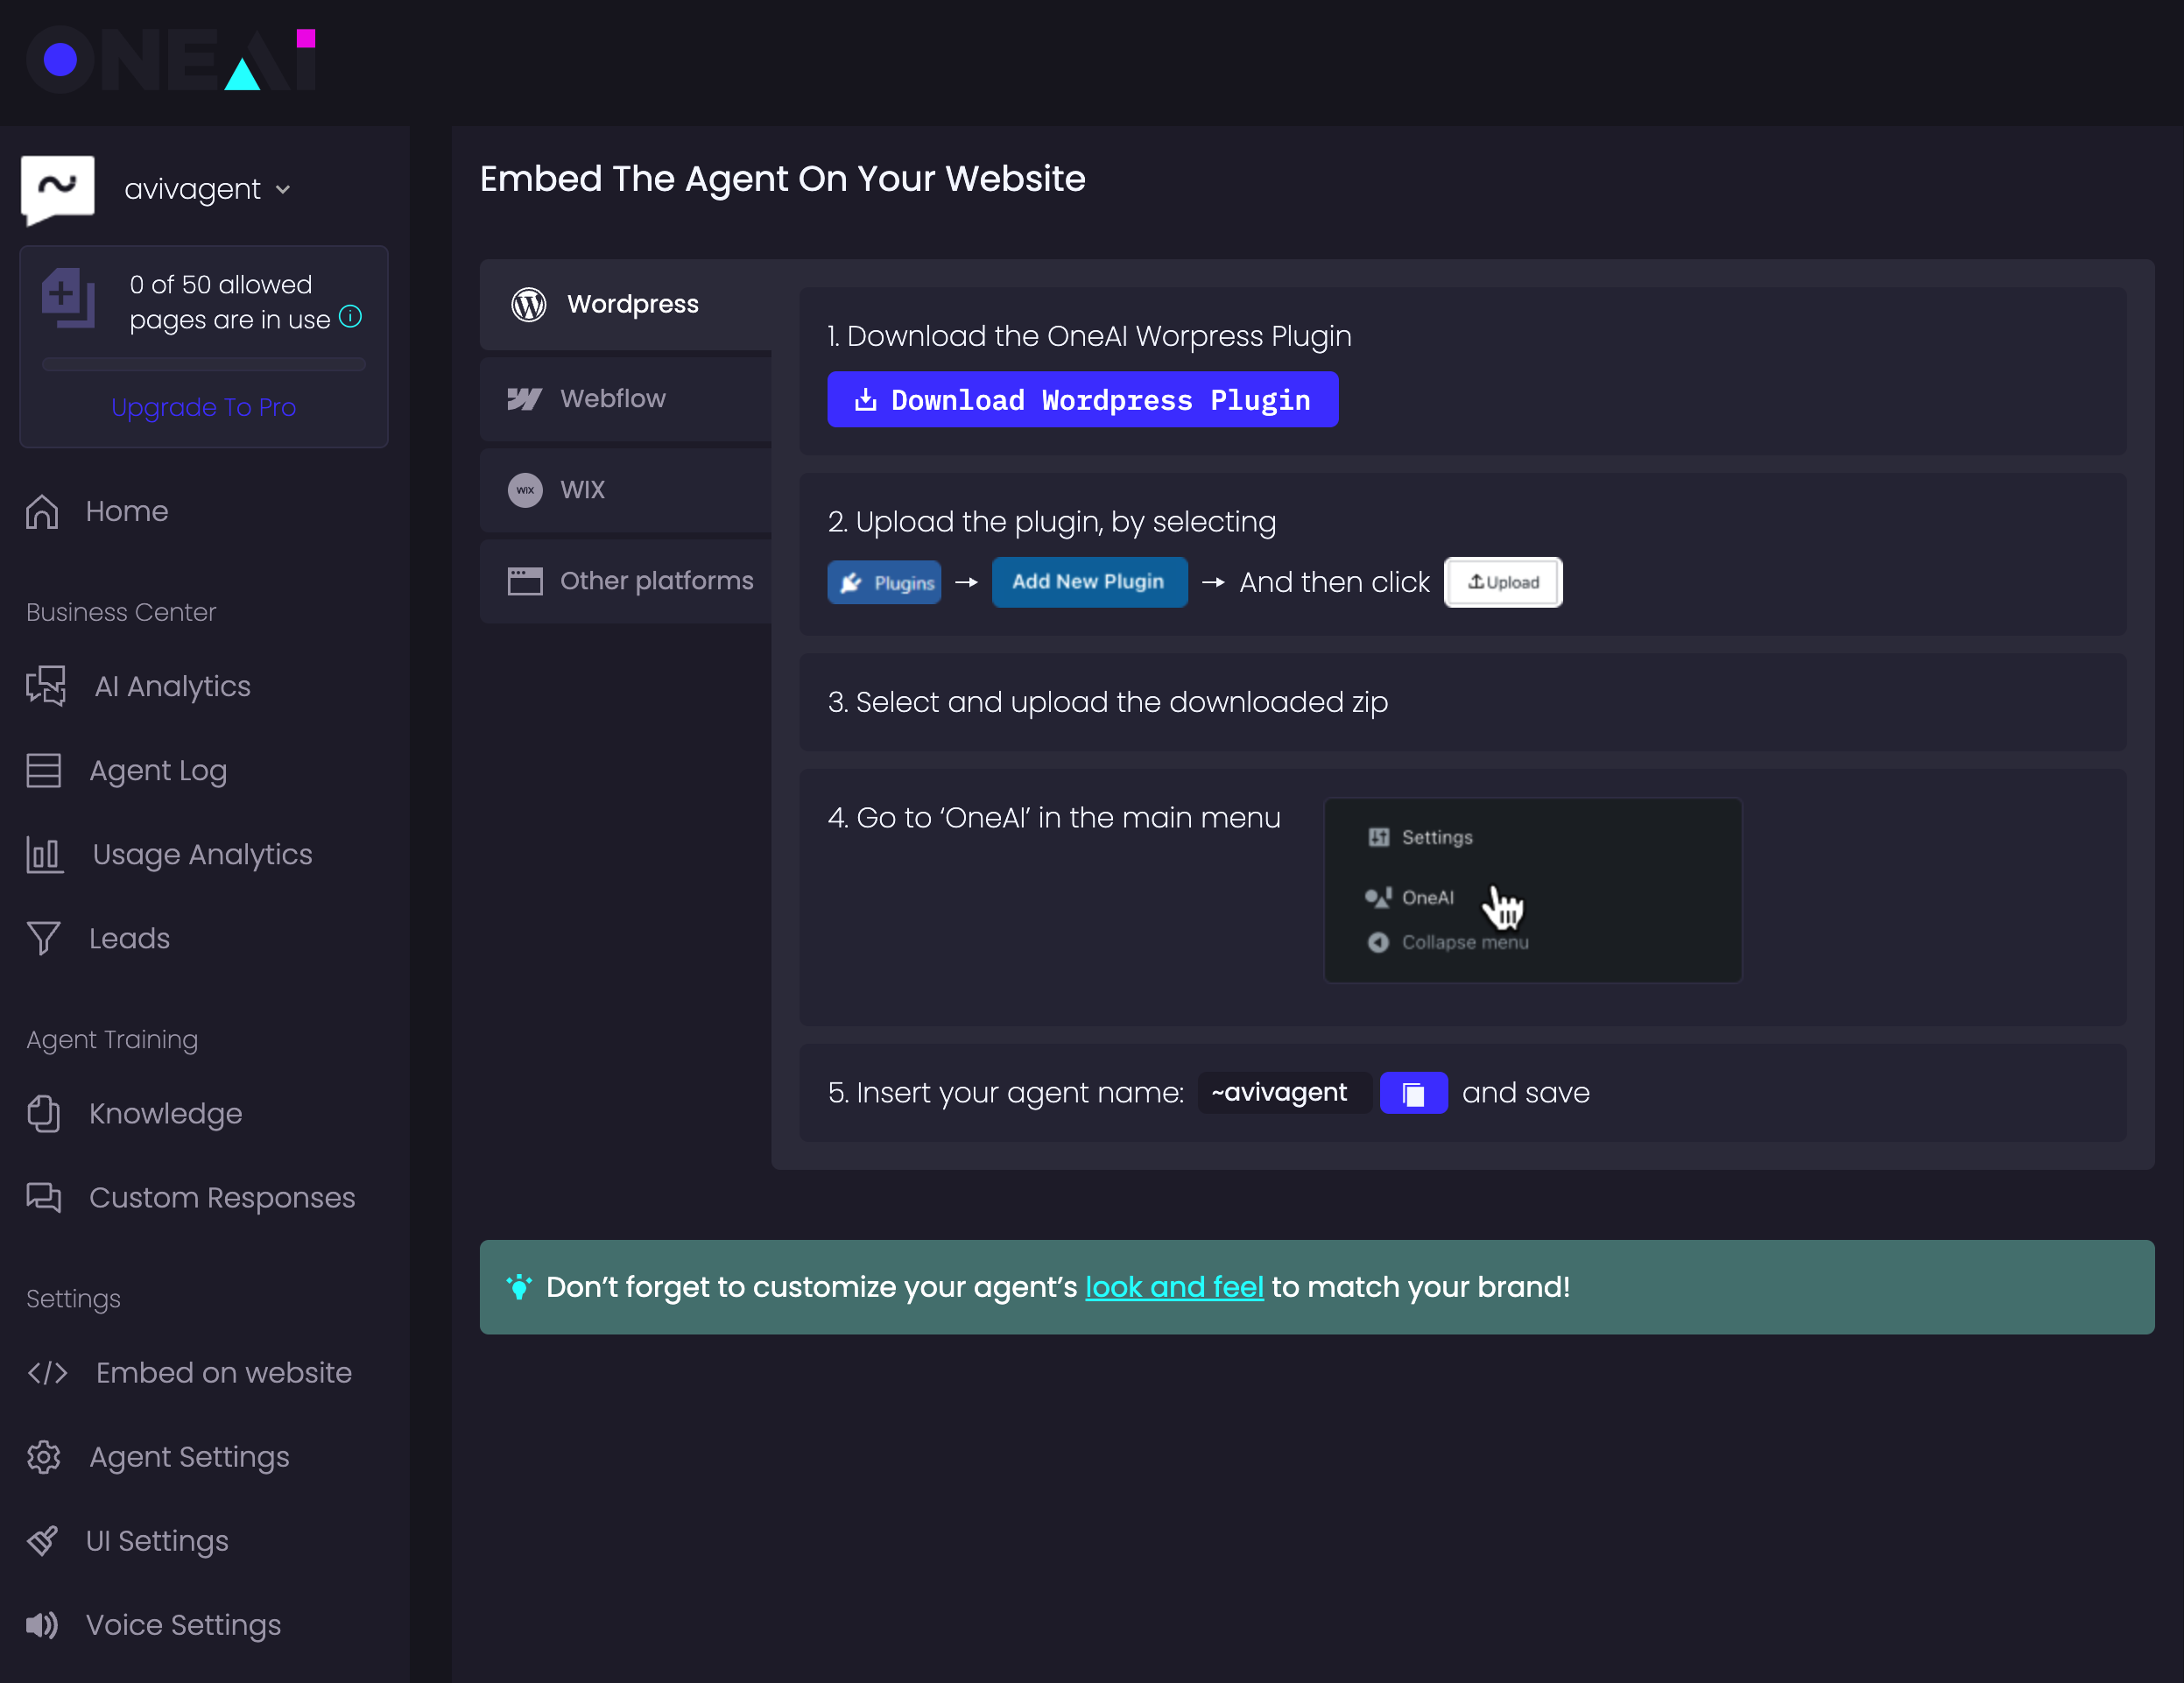
Add OneAI Agent to your website
There are several options to embed an agent on your website:
- The easiest way - use our plugin. We have built in plug-ins for Wordpress, Webflow and Wix (more are coming soon!)
- Use our embedding code snippet (click 'Other Platforms' or see here
- Use our Agent Chat API
- Use or Voice Integration to connect the agent to your telephony system (talk with your designated One AI Success Manager for more details)
Updated 3 months ago